Aerial Waterway Collage
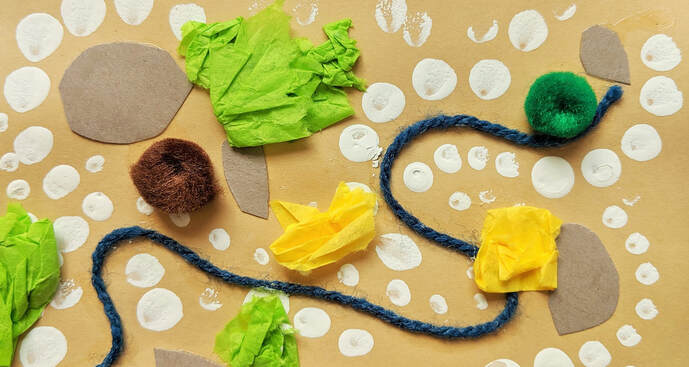
We learned about the importance of fresh water to all living things and how it is imperative to keep our water clean. Aboriginal artists create abstract paintings based on water hole and waterway "maps", we used these abstract paintings as inspiration for our abstract waterway collages. We learned about the major waterways in our state of Rhode Island and we created river collages using blue yarn and various earth-toned papers.
Bilateral Symmetry Designs
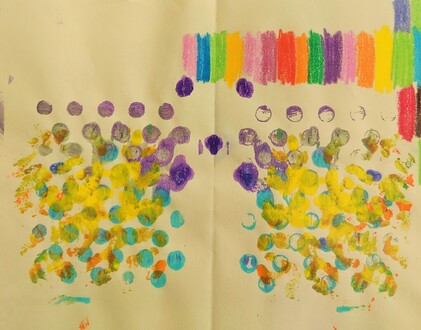
There are so many things that can be done using patterns in nature. For our lesson we learned about different types of patterns found in nature, like the Fibonacci Sequence and bilateral symmetry. This simple project used gel-print blocks with fun patterns to create symmetrical folded abstract art. We layered our pictures with multiple colors and patterns.
Microscopic Petri Dish Paintings
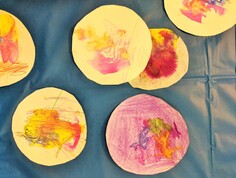
Our Microscopic art lesson was sparked by my discovery of San Francisco artist Klari Reis and the "Daily Dish" project from 2013 where every day for a year Reis created a different abstract "painting" using reactions inside a small petri dish. We first learned about how a microscope works and then we created our own petri dish paintings by using an eyedropper to drip rubbing alcohol onto blobs of paint to create different designs. We then printed those designs onto coffee filters to create small abstract circular paintings.
The Magical World of Roald Dahl
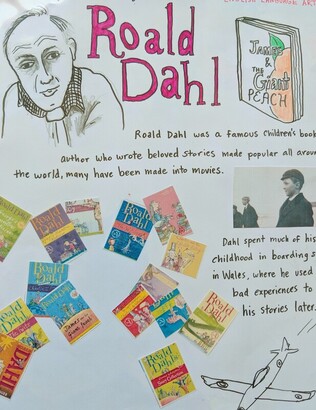
I was very excited to teach about Roald Dahl and the use of stop motion animation in many of his adapted movies. Many of the students are extremely interested in animation and I would like to eventually get the technology to animate some of our creations. We learned about Roald Dahl's many stories, how he used his life experiences to inspire him, and how movie makers work as a team to adapt the stories into amazing animated movies such as James and the Giant Peach and Fantastic Mr. Fox. I explained the way animation works by creating a Thaumatrope- which is an optical illusion toy consisting of two images on either side of a circular piece of cardboard (usually a bird and an empty birdcage) that when spun (using strings attached to opposite sides) creates the illusion that the images are combined. Instead of using the typical bird-in-birdcage image, I used a peach stamp and a bug character from the story James and the Giant Peach
Pi Day Circle Drawings
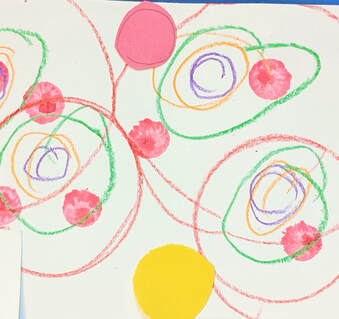
March 14th is Pi Day, and although during that week I was out for the NAEA Conference in Boston (see Art Teacher Adventures) we were able to talk about Pi the previous week and learned about artist Wassily Kandinsky who created precise circle designs. We practiced tracing circles from round items like rolls of tape and we even learned how to use a string tied to a pencil to create an (almost) perfect circle. We cut out our circles and made abstract layered circle paintings.
Layers of the Earth
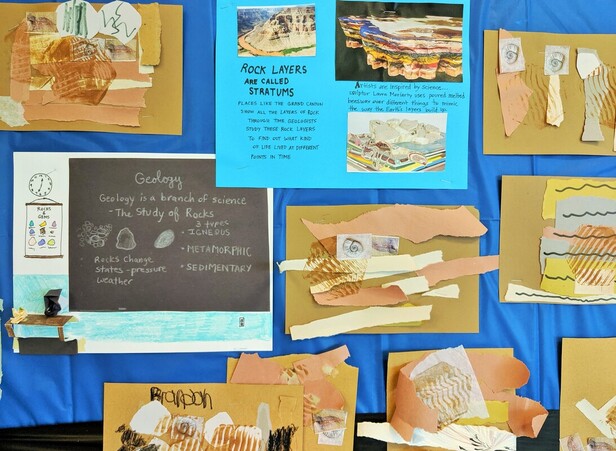
For our Geology lesson I found this cool artist named Laura Moriarty who creates these earth layer sculptures using melted beeswax poured over a variety of objects to mimic the way the earth forms over time and how obstructions effect the layers. As we did not have a safe way to experiment with en-caustic art, we used ripped pieces of earth toned paper to create our earth layer collages.
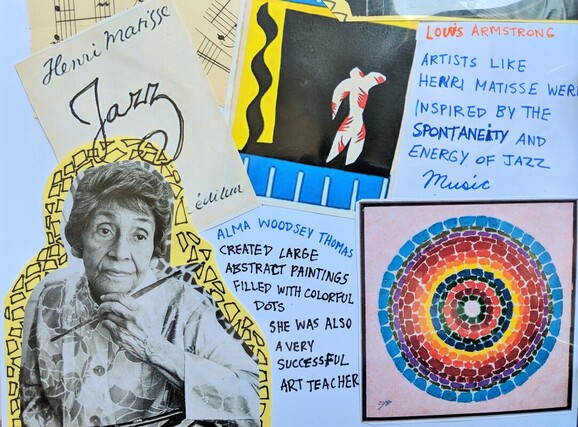
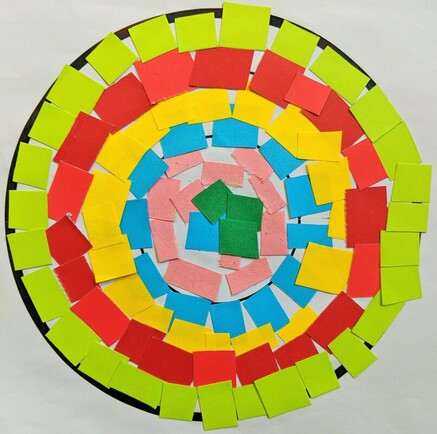
Alma Woodsey Thomas Colorful Collage Circles
Art Show 2018!
Last spring we held a book fair in our gym and we were able to hang our artwork that we made throughout the year. Unfortunately we are unable to have bulletin boards, so we had to make do with wall and window space.
Sudanese Baskets
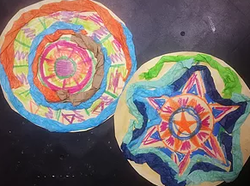
For our lesson on the country of Sudan we created baskets out of paper with colored tissue paper crumpled and woven around in a circular pattern. Students colored them with crayons and we followed the patterns with the raised tissue paper.
Toghu Cloth from Cameroon
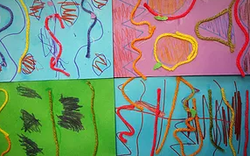
For our lesson on the country of Cameroon we focused mainly on the wildlife and the work people are doing to save the endangered rain forest species. We watched a quick video on the Cross River Gorilla and what research teams do to study the gorilla's habitat. We created a paper version of "Toghu Cloth" using colored yarn.
Nigerian Tunics
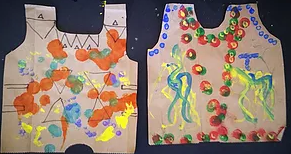
The Yoruba people in Nigeria have a long artistic history. Many of the ancient sculptures and artifacts are located in museums around the world. The Yoruba are also known for their beautiful beaded tunics and headdresses made with bright colorful beads and some depicting animal figures. We created our own painted version of the tunics on paper bags, using dab and dot markers as well as bright acrylic paint applied with Q-Tips to create the bead-like dots and patterns.
Kente Cloth Collage
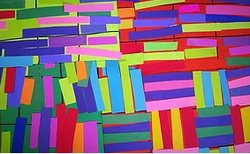
Kente cloth is a bright patterned cloth native to Southern Ghana (and became a fashion statement in the USA in the early 1990's) There are many different way to create homages to Kente cloth, I chose a simple method of taking tiny strips of construction and card stock paper and arranging them in a pattern of alternating horizontal and vertical strips. What I thought would take only a few minutes of pasting random pieces of paper together turned into a project where students were planning out where they put their strips, and really thinking about their color decisions. Many students enjoyed creating unique patterns.
Moroccan Prints
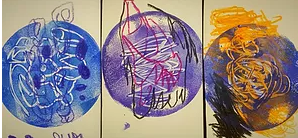
Morocco is such an amazing and colorful country- especially for artists! We played around with some experimental print making using Gelli* Print plates (a special gift from last year's Art of Education Summer conference) The students LOVED using the print plates and the Moroccan stencils that I cut out so much that I allowed them to create extra prints
Tunisian Doors
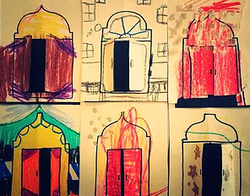
I decided to combine the countries Algeria and Tunisia since the geography and culture is pretty similar. Along the Mediterranean Sea these countries have beautiful brightly colored buildings with decorative doorways. We created patterned doors that popped open and some students even designed interiors! We also embellished some of them with gold paint marker.
Drag Painting
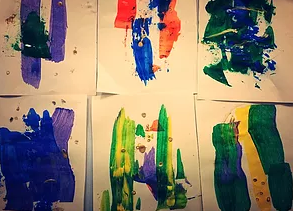
Calligraphy is a special art form in the Middle East and for Iraqi-born artist Hassan Massoudi it is his preferred subject for painting. After learning about the cuneiform writing of the ancient Sumerians in Iraq- we shifted our focus to an artist who creates modern paintings using Calligraphy as a design form. Massoudi uses a special painting technique that I call "drag painting" usually done with a thin piece of wood or plastic. I simply laminated strips of paper to created drag painting tools and the students experimented with different colors. I especially like the way the thin layers of colors mix slightly so they appear almost transparent
Iranian Tiles
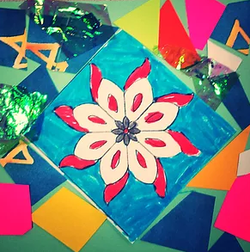
In Iran they have beautiful mosques with elaborate decorative tile work and stained glass. We used an iridescent cellophane over arabesque designs with "shards" of colored paper to mimic the mosaic tiles.
Kites Over Afghanistan
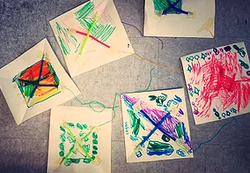
Talking about the Middle East can be sad and controversial, but I thought it was important to discuss how other people live around the world, even if it can be a difficult topic. We watched a video on Malala Yousafzai and her mission to improve conditions for girls and women throughout the Middle East and her fight for education. We also discussed the tradition of kite fighting in Afghanistan and other surrounding countries and we created our own small kites using paper, straws and string.
Ukrainian Easter Eggs
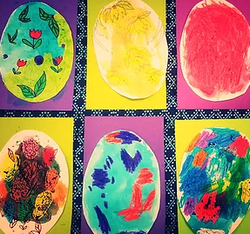
The week before our April Easter vacation was a good time to incorporate the country of Ukraine because they are known for their beautiful traditional Easter Egg painting. We watched parts of the Reading Rainbow episode involving the Ukrainian folk tale Rechenka's Eggs. It was really neat to see the author Patricia Polacco herself talking about her Ukrainian history and painting eggs as she spoke. (Watching Reading Rainbow also made me feel very nostalgic for my childhood) We created our own elaborately painted eggs on watercolor paper using paint over a crayon-resist.
Carpets of Azerbaijan
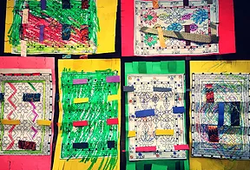
Azerbaijan is one of those countries that many people don't know much about or have not heard of altogether, including myself. After doing some research I found that Azerbaijan has a really rich cultural history with both European and Middle-Eastern roots. The country is especially known for its long tradition of carpet weaving- so much that there even exists a museum dedicated to carpets. For this project we used construction paper woven with colored patterned paper to create miniature carpets.
Turkish Designs
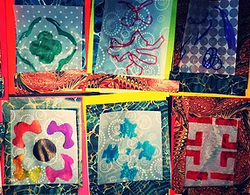
For our lesson on the country of Turkey we learned about the Ottoman Empire and the influence of Turkish design around the world. We created stenciled designs on frosted transparent vellum paper and laid that over sheets of marbled paper to create a card. We listened to some Turkish pop music that was very catchy
Santorini Cityscapes
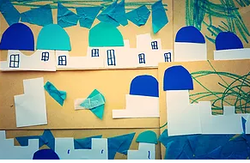
For our lesson on Greece we talked about the ancient Greek city-states and their influence on the Roman Empire that followed. We mentioned the start of the Olympics and watched a video about Athens Greece from Brainpop.com. After we used card stock in blue, white and grey to create city-scapes based on the cliff side town of Santorini.
Portuguese Azulejos
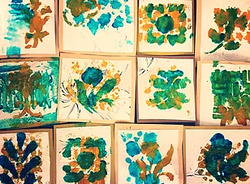
For our lesson on Portugal we created paper versions of Portuguese Azulejos- or painted tiles. These tiles adorn many buildings in Portugal (and the occasional designer back splash in kitchens around the world) We used textured wallpaper on squares of card stock. We then used paint in blue and yellow with stencils to create our designs. I love stencils and printing processes for students of all ages because of the many beautiful and unexpected results
Spanish Guitars
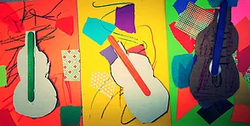
This week we talked about Spain and the mixture of different cultures throughout the country. We talked about Spanish traditions like Siestas and The Running of the Bulls. Students also thought the tomato fight festival was pretty silly. We created these "cubist" guitars loosely based on Picasso's guitar collages and sculptures. I think it's important to teach students that not all famous artists worked with "high-quality" materials and some of the most famous pieces are made from very simple things that you can just find around the house!
Lily Pond in France
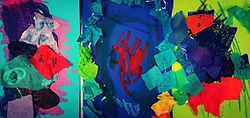
It was really exciting to do a lesson on France since it still is a very prominent place in the art world, and even better for me because I was able to show my personal photos from Paris. Almost ten years ago I took a spontaneous weekend trip to Paris while I was visiting my boyfriend (now fiance) in Germany. The trip was very poorly planned, but since art is literally everywhere around the city it was almost okay that we missed the Louvre (I said almost) For our project we circled back to Monet and created lily ponds using Playcolor solid poster paint crayons and tissue paper collage on top. This project was perfect for letting loose and experimenting with overlapping mediums. My proud teacher moment was when I had a student carefully draw the Eiffel Tower from observing my picture on the Smartboard! Someday I will get back to Paris to see all the things I missed (and make SURE not to save the Louvre for the day we fly back out!)
Austrian Architecture
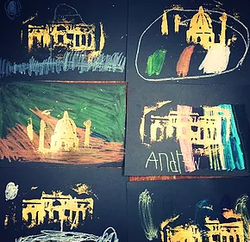
I absolutely love the beauty and forgiveness of printmaking and how it can be done with fairly low-tech equipment. For this project I carved out the outline of some famous buildings in Vienna, Austria into foam board with an Exacto Knife. The students used mini hardware store paint rollers (I may invest in a brayer at some point!) We rolled a beautiful gold craft paint onto the foam board and the students printed them onto black paper that they had designed with bright crayon colors.
Polish Pottery
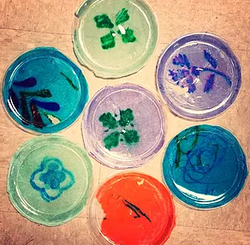
Although we don't have the equipment (or the space!) to make actual pottery with clay, I wanted to still make a plate design. We took stencils and drew with marker very carefully on cut tissue paper circles (the kids were surprisingly extremely gentle!) Then we used a Mod-Podge like mixture of glue and water to decoupage the tissue paper onto small plastic plates. Although they were decorative and not functional they turned out very nice!
Windmills in the Netherlands
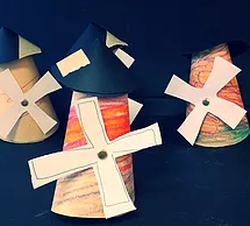
For our lesson on the Netherlands we talked about amazing Dutch Engineering and their use of water and wind power. I also showed a video on Youtube explaining how 16th century windmills work which I thought was pretty interesting. We made some simple paper windmills with spinning parts secured with brads. I will try using cups in the future instead of curled up card stock for better durability.
German Cuckoo Clocks
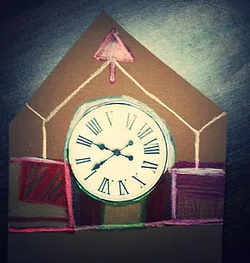
This lesson was fun for me especially because I have been to Germany (about 10 years ago!) so I was able to talk a little bit about what it was like there. I showed the students the wooden carved black forest cuckoo clocks and we created paper versions with hanging pine cones and birds that popped out on a pipe cleaners (some classes were unable to get to the bird part because we ran out of time) I had one student so proud of his clock he hung it up in his little cubicle area which made me smile :)
Lego People
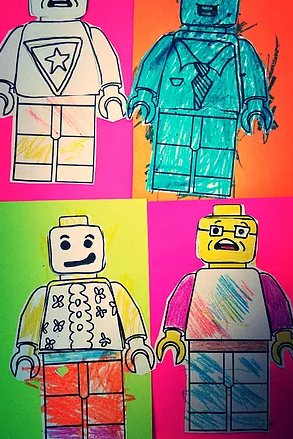
I was very excited about this particular project because who doesn't love Legos? I was also glad that I could incorporate it into my unit on art around the world. We talked about Lego's birthplace: Denmark and their interesting approach to education. Teachers and students alike enjoyed watching a short video about Denmark's "Forest Kindergartens" where kids run amok in the woods with very little adult supervision. I could go on an on about the importance of free play in nature- but that's a topic for another time! I've included a link to the documentary in the inspiration corner! Students were really pumped to create their own Lego figures. I had some pre-designed faces and shirts, but I enjoyed seeing some students draw their own.
Finnish Patterns
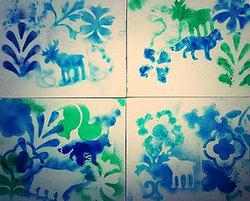
A couple weeks back I found a Crayola marker airbrush kit on clearance at Wal-Mart for five dollars. It turns Crayola markers into airbrush paint by clipping them into a pump. I was kind of hoping this would be a solution for all those markers that are almost dry but still have a little life in them. It turns out that the markers needed to be practically brand new for it to work and even then it would jam up randomly with no signs of why, which is why I am glad I made this a group project! We talked about Finland and created a group project using stencils that reminded me of some Finnish patterns I came across. We laid the stencils down on canvas boards and sprayed with blue and green toned markers. When the airbrush worked the students really enjoyed spraying with it, but I would never shell out the thirty bucks it retails for- watch for a clearance- then it's worth it!
Swedish Dala Horse
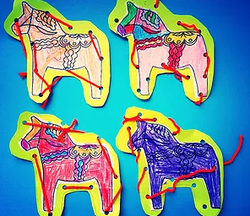
For our lesson on Sweden we watched a short video on the Nobel Peace Prize and the history behind it. We also discussed Swedish architecture and interior design. Our project was a Swedish Dala horse that we colored and then laced around the borders with yarn.
Viking Ships
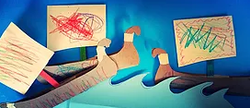
This week we talked about the history of the Vikings and the amazing ships they built. We used simple cardboard, paper and Popsicle sticks to create miniature Viking long ships. We learned about the history and landscape of Norway and Rosemaling- which is a form of Norwegian decorative painting.
Northern Lights in Iceland
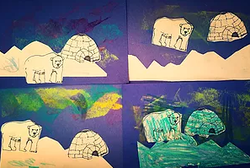
This week we talked about Iceland and all its incredible natural beauty. We watched a video on how the Northern Lights work and a really cool time lapse video of the midnight sun in Iceland. Needless to say all this research is taking a toll on my travel itch! For our project we used Crayola drawing chalk in northern light colors like bright green, yellow and turquoise on a blue construction paper background. I also sketched some igloos and polar bears to add to the pictures. I liked the look of the chalk on the paper so much that I think I'll make a chalk project in the future using larger paper.
Irish Knots
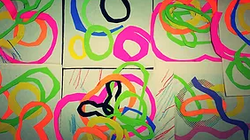
For our lesson on Ireland, I incorporated a little background on the origin of Halloween (I just could not get myself to talk about St. Patty's Day when it is so far away!) We watched a video about Halloween's Celtic origins and played around with loops of colored paper to create some crazy awesome abstract designs based on the Celtic knots.
Canadian Haida Prints
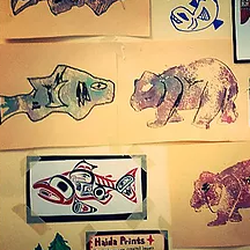
When I was visiting Niagara Falls last April I noticed these really cool Native American prints in the gift shops that reminded me of the stylized animal figures on totem poles. After doing some research I found they were related to the Inuit and Haida groups that live in Canada and the arctic regions. I carved some stamps from foam board into the shapes of bears and fish. We then took a paint roller and used either turquoise or red paint to create prints and the students added designs after with black crayon. As a class we also decorated a piece of a totem pole that I eventually put all together in a display.
Brazilian Basket Weaving
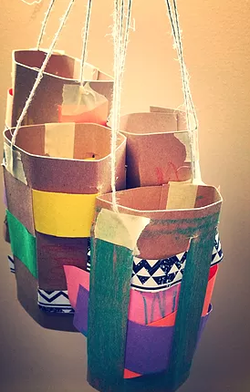
We talked about the half of South America with the Amazon River and rain forest. I showed the students the different people that depend on the river and the land around it to survive and how they use nature to build their homes. We practiced paper weaving with patterned and colored paper strips in simple cut-cardboard looms that I made. After coloring the "baskets" we joined them together with tape to make a tube form and tied some twine at the top. The OT department loved the inclusion of fine motor skills in this project!
Peruvian Llamas
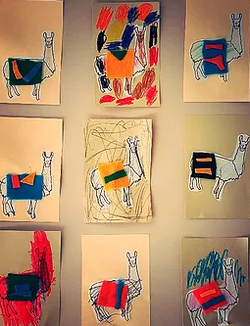
I decided to split South America down the center and talk about the Andean coast first. We made llamas decorated with colored felt because llamas in Peru are usually decked out in colored blankets and because I love llamas <3 We learned about Machu Picchu and the many different cultures that lived in the Andes mountains.
Costa-Rican Ox Cart
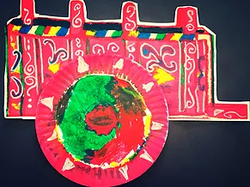
For our lesson on Central America we created two different projects, the Costa Rican Ox Cart wheel as a group project and paper "Molas" for an individual project. I had the privilege of travelling to Costa Rica in 2014 for my fiance's cousin's wedding in Guanacaste so I showed the students some cool pictures of the animals we encountered on our travels there including monkeys, iguanas, and alligators. The Ox Cart is a very popular motif in Costa Rica so we created one for each class using the Playcolor paint pens (a freebie from the Art of Ed Conference). As some students were adding their marks and scribbles to the group "wheel", each student made a paper animal, using layered colored paper to mimic the layers of fabric Molas from Panama.
Mexican Tin Art
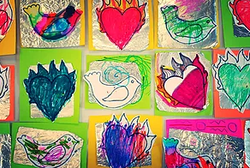
We already covered the history of Mexico and its artists when we talked about Frida Kahlo (my personal fav) and Diego Rivera. This time we focused on traditional Mexican craft art that is still popular today like Papel Picado and hammered tin designs. We used tin foil (heavy duty only!) to create shiny ornaments with Mexican designs and I also showed the students how to make cut paper designs similar cut snowflakes that we make in the winter.
Dream Catchers
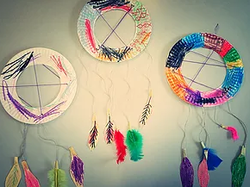
I started our Art Around the World Unit with The USA and we talked about the geography of our country and the many different climates. We learned about the Native American groups that lived in the USA and the still surviving groups today. We made dream catchers from paper plates, string and feathers. This was one of those projects that I created from having an over-abundance of something- in this case- feathers!
Printed Fish School
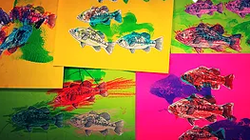
This week we talked about EMPHASIS and how artists can draw attention to a certain element in their artwork. We learned about the impressive net paintings of UTTAPORN NIMMALAIKAEW (NO, I CANNOT pronounce that name!) and Li Hongbo's very cool paper accordion-style busts. We then made fish prints using cut-out fish templates in various sizes for the background and blue printed fish shapes on top of those. I cut my own fish stamp from a piece of craft foam glued to foam board. The students enjoyed rolling the paint roller over the stamp, which means I'll definitely include more printmaking in the future. The idea was to color the white paper fish in the background and have the big printed fish stand out for emphasis, but it turned out to be a lesson in pattern or harmony since no area really stood out over the other in the end (oh well! Still a fun project!)
Symmetrical String Painting
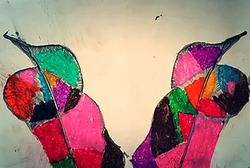
For this class we talked about BALANCE and how art can look balanced or unbalanced depending on how the elements are arranged in the picture. We talked about the three different types of balance: symmetrical, asymmetrical and radial. Students created symmetrical string paintings by soaking a string in black paint and then printing between a folded piece of paper. The students really enjoyed pulling the string out and revealing the printed design. We then used oil pastels to add color to our designs. One particular student colored each section a different color!
Out of Proportion Bug City
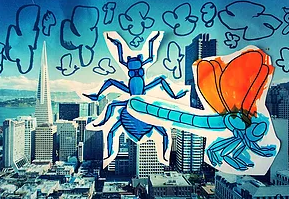
This week in art class we talked about proportion and scale and the different artists who create either small scale or large scale work. Scale model artist Michael Paul Smith creates impressive models that appear to be life-size because of the carefully placed camera angles. We discussed how the movie industry uses scale models for special effects. For large scale artists we talked about Ron Mueck who creates large scale human sculptures that are hauntingly realistic. Each student created a city scene with enormous colored bugs in the foreground.
Mannequin in Motion
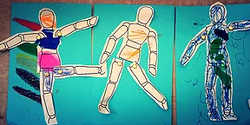
For this week's lesson, we talked about the use of rhythm and movement in artwork. I discussed the many ways that artists imply motion in painting and drawing. We then talked about the history of animation and I showed a video of animators working on the movie The Lion King. In this digital age, it was nice for the kids to see how much work it used to take to produce an animated movie without computers! We made "dancing" paper artist mannequins using brass fasteners at the joints of the arms and legs. We listened to Justin Timberlake's new song "Can't Stop The Feeling" as we colored- which the kids (and the staff!)really enjoyed. Nothing like dancing to break up the day!
Pattern Tessellation Wallpaper
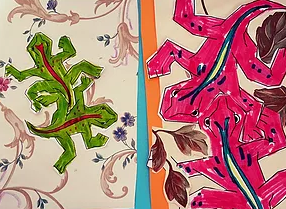
Last week we talked about Pattern and MC Escher's Tessellation designs. I explained the difference between exact patterns and varied patterns. Each student picked a floral or leaf wallpaper pattern for the background, then we colored in tessellations based on MC Escher's lizard design.
Aerial Perspective Cityscapes
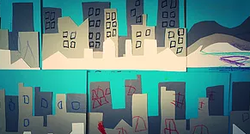
This week we talked about the use of space in art. I explained the difference between positive and negative space and how artists use Aerial or "Atmospheric" Perspective to make landscapes appear to have depth. We also looked at some cool anamorphic art, including the work of Bernard Pras who creates "portraits" out of junk objects looked at from a certain angle. We then made either cityscapes or landscapes using different shades of paper to make the effect of atmospheric perspective.
Texture Collages
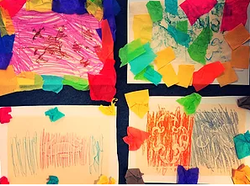
The element of the week was texture, so students first made crayon rubbings over stencils and then added those designs to a "texture collage" which included different types of paper. We talked about the difference between actual and implied texture in art and we looked at examples of artists with very textural work. If I could do this project again, I would have added a few more different textures that could be easily glued, like bubble wrap and sandpaper.
Color Hot Air Balloons
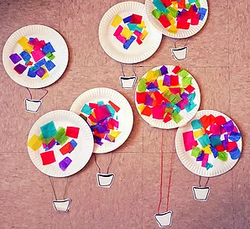
This week I was very excited to talk about color, because it is one of the most fascinating and mind-boggling concepts to me. I talked a little bit about the science of color and how our brains perceive light differently. I also included a small color "experiment" using milk, dish soap, and food coloring. I showed how the dish soap reacted to the fat in the milk (which is why you need to use whole milk) and made the colors swirl around. I found that not all dish soaps work the same however, since I bought cheap Ajax and I probably needed something a little stronger to make the swirling a little more dramatic. For the project we made hot air balloons with colored tissue paper glued to paper plates. I showed the students how the transparent tissue paper changed color when other colors were layered on top of it. It was a less messy way to mix colors without using paint! We also attached little "baskets" with colored string.
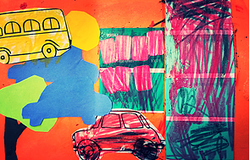
This week the kids are learning about value (not values like morals- which prompted a lot of faith-based art projects on my Pinterest search) but Value in art- the range from light to dark. I explained the use of value to make drawings and paintings look realistic and three dimensional. I also showed a short time lapse video of a hyper-realistic drawing of a bag of M&M's that many of the kids were fascinated by. Every student got to choose a couple paint chip color strips and create buildings out of them using small rectangular stickers for windows and cut-out trees, cars and clouds to decorate around them.
Chihuly-Inspired Coffee Filter Flowers
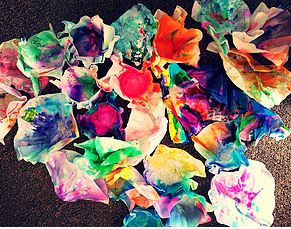
Ok, ok, I know this project may be over-done at this point, but I love how the flowers look all together and I have the most success with projects that have a transformation aspect to them. My kids really enjoy seeing something change before their eyes, in this case it was spraying the coffee filters with starch after coloring and watching the vibrant colors bleed together. Once dry I will put them all together into a long Chihuly-inspired flower display. The students were also mesmerized by the glass blowing process when I showed them a youtube video to get the idea of how the actual glass flowers were created. I loved this project because the coloring on the filters can literally just be scribbles of color and once the starch bleeds the color it creates an amazing effect!
Foam Shape Collage
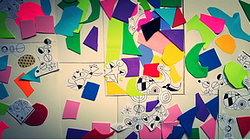
For my lesson on using shape I explained the difference between geometric and organic shapes and we practiced making shapes in our sketchbooks. My goal is to have a small sketchbook exercise before the main project, that way the books will be used as a "practice" work space and students will understand the nature of the sketchbooks. Although I give short practice assignments, I am still encouraging the students to add their own drawings and details to personalize their books. I showed a video of Bruce Riley working using resin to create funky organic shapes that change form as the resin sets and then the students made layered collages using craft foam shapes and paper. I included some shapes from Spanish painter Joan Miro's work to add to their collages
Cassette Tape "Line Drawings"
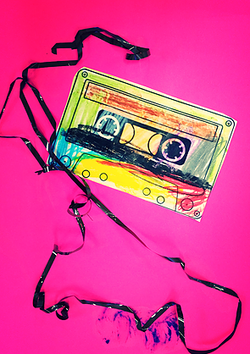
This lesson idea came from the need to purge my house of things that I no longer use, and I thought the tape from cassettes would make the perfect medium to explain how to use line without using traditional drawing materials. We talked about the use of line in artwork and the many different effects that lines can create. I gave each student a piece of neon card stock, a cassette tape print out and a length of actual tape from old cassettes (just not my mix tapes from the early 90's- too much work went into making those!) We listened to one of my favorite bands, The Black Keys and the students colored their tapes and glued the tape down in fun tangles. I showed the work of cassette tape artist Erika Iris Simmons who makes beautiful portraits of musicians using the tape from old cassettes.
Muniz "Scrap" Collage
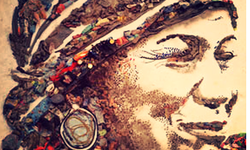
This was the final lesson from my Art Through History unit. I explained how since the invention of the internet and the advancement of technology, artists have needed to become more creative with materials. This lesson focused on using unexpected materials to make art. I talked about Damien Hirst, Andy Goldsworthy, and one of my favorite contemporary artists Vik Muniz (the chocolate syrup guy). I showed the students Muniz's impressive negative space trash pictures and we created collages using old scraps from previous projects. One of the great things about researching for my project ideas is that I stumble across new fantastic things that artists are doing and it makes me really excited to see that originality still exists. Unfortunately my model for this particular project was lost in my cart-life shuffle so the image I included is the actual work part of the "Wasteland" series by Vik Muniz
Haring Dance Figures
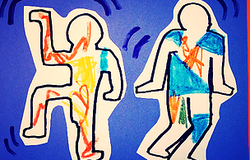
This lesson was one of my favorites because we talked about the history of Hip Hop and its relation to Graffiti art in the 1980's. We talked about the many different forms of street art and we made colorful dancing figures based on the work of artist Kieth Haring. We played some Sugarhill Gang (Rapper's Delight is clean and 15 minutes long!) and the students really enjoyed listening to the music as they worked.
Ringgold Story Quilt
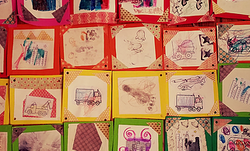
For Black History Month I talked about the Black Arts movement in the 1970's and the importance of diversity in art. I played a read-aloud video of Faith Ringgold's "Tar Beach" and each student made a section of a "Story Quilt" using squares of canvas paper glued to squares of colored craft foam. Students used markers and stamps to create their design. I threaded them all together to make a quilt using yarn.
Marbled Paper
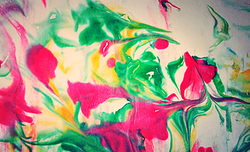
For this lesson, I talked about performance and political art in the 1960’s and 70’s and we listened to The Beatles (who doesn’t love the Beatles?) For the project the students made psychedelic marbled paper that I eventually used for the covers of their sketchbooks. I have always wanted to try a marbled paper project, but I have experimented with many different "recipes" and most of them were completely unsuccessful or the color wasn't bright enough. I found the simple shaving cream with dots of food coloring to be the best! (but VERY messy). I bought cheap foaming shaving cream, food coloring, and a tin foil baking tray. After spraying a layer of shaving cream in the tray, I let the students pick out colors and swirl the drops with a stick. They gently pressed cardstock paper onto the shaving cream surface and I used a squeegee to wipe the excess shaving cream off the paper, after waiting a few minutes for the color to set. This lesson was a little tricky as a travelling teacher with no sink, but I managed, even if my hands ended up multicolored!
Warhol Pop-Art
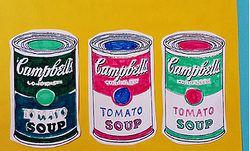
Pop Art is a very fun subject, especially because students love seeing recognizable things in a different way. This project was more focused on using bright unexpected colors to make "commercial" images based on the work of Andy Warhol. I printed out some Warhol coloring pages and students were able to arrange the designs on bright colored cardstock and color them in using markers.
Pollock Splatter Paintings
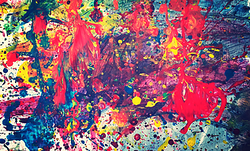
This project actually turned out better (and surprisingly less messy!) than I originally thought it would. I'm all for getting messy with art, but I was a little nervous when I reached the Abstract Expressionist movement. We learned about Jackson Pollock's splatter paintings and I had each student add their own splatter to a class painting. We used a cardboard box (about 8 inches deep) and we placed a small canvas at the bottom. Each student took turns spattering with a brush and dripping with small cups. I was very happy with the end result!
Mexican Sugar Skulls
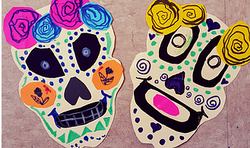
For this lesson I was excited to teach my students about one of my favorite artists, Frida Kahlo. Most of the things that happened in her life were not "age-appropriate" subjects for my art class, but I was still able to explain that she began painting after being bedridden by an accident and how sometimes unfortunate things can lead to unexpected results. We talked about art in Mexico and the importance of mural painting, then we each decorated a paper "sugar skull" using bright neon cardstock cut into different shapes. Each student started with a skull head shape on thick paper.
O'Keefe Flowers and Bones
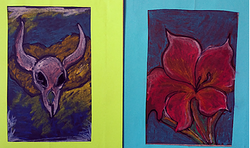
At this point in history, most of the focus had been on European art (mainly in Paris- where the center of art was), but during the 20th century, there were many notable artists in America as well, so I created a lesson based on the work of Georgia O'Keefe. (If you look in my Portfolio you can see I was inspired by her for my own work as well). We talked a little about the influence of The Great Depression and how artists used art to show the hardships of life and the beauty of the country. I gave each student a choice to color in an outline of a bull skull or a flower (the skulls were very popular). We used chalk pastels on toned cardstock
Masking Mondrian
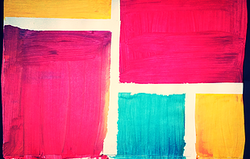
For this lesson we talked about the influence of The Bauhaus School in Germany and about how certain styles of art carried into architecture and interior design. I showed a virtual tour of Frank Lloyd Wright's "Falling Water" and we talked about the painter Piet Mondrian. I was able to use the painter's tape again for this project (yay!) We used pure tempera paint color in each section of the paintings and we peeled the tape off at the end. (I feel the same way people feel when they pull that plastic film off a new cell phone whenever I peel painter's tape away!)
Art Deco Stained Glass
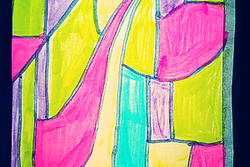
Students learned about the Art Deco movement and the emergence of Jazz music. I used a vellum paper that I searched everywhere for, but could only find it at Staples, which was not ideal because I think their prices are outrageous! I taped the paper to a thin cardboard frame and had the students trace designs based on Art Deco stained glass with markers. We listened to Jazz music as we worked and the students enjoyed putting their stained glass in the windows to see how the light shined through.
Surrealist Landscape
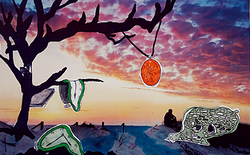
The students learned about the Surrealist movement and the work of Henry Magritte and Salvador Dali. We watched an interesting animated movie called "Destino" which was a collaboration between Dali and Disney, but wasn't released until 2003 when Disney artists compiled all the sketches and ideas and turned it into a film. For the project, I printed out calendar landscapes (mostly beach scenes) in full color and the students were able to add their own "surrealist" elements, like melting Dali clocks and strange mountain forms.
DADA Trash Collage
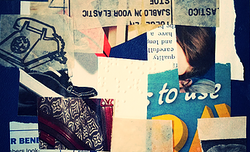
For this lesson, the students first learned about the Dada art movement and the importance of making silly, nonsensical art that doesn't mean anything. We first made nonsense word poems by having each student pick out a word or phrase from a bag of magazine clippings, then students made their own trash collages based on the work of Kurt Schwitters using vintage newspaper, dress pattern paper, and other random assortments of paper.
Picasso Heads
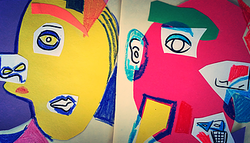
Students learned about the Cubist movement and they used printed out Picasso-style facial features to create funky faces. They glued their facial features onto a round head shape. I enjoy collage projects because they aren't as messy as painting and even though you are basically using the same materials, every project turns out different!
Drawing with Scissors- Matisse Cut-Outs
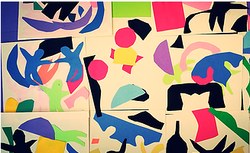
Students learned about the Expressionism movement and we created paper cut-out collages based on the work of Henry Matisse. I had pre-cut shapes that were based on Matisse's shapes and students glued them down in their own patterns. Learning about Matisse was interesting because his style of art changed when he could no longer walk (he went from painting to paper-cut outs) and it was nice to learn that physical problems didnt limit his creativity.
Klimt Trees of Life
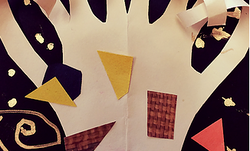
We learned about Art Nouveau in Paris and the many different artists during that period, with a special focus on Gustav Klimt. Each student used a tree template, which they decorated with scraps of patterned paper, construction paper, and gold paint pens on black cardstock paper (I found that construction paper is too flimsy to use as the background for anything- and cardstock is not that expensive if you know where to look) We then "curled" the branches using crayons.
Collaborative Starry Night
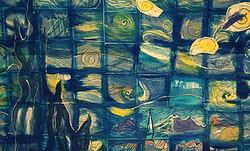
This lesson took me a lot of time beforehand (and after), but the end result was amazing! We learned about Post-Impressionist painters and we focused on Vincent Van Gogh. I first created a giant outline drawing of "Starry Night" and each student was given a numbered square of dark blue construction paper from the outline drawing. The students used oil pastels and a gold paint pen to design their squares. I put it all together (after some searching for missing numbers- where is #37!!!) at the end to form a class recreation of Starry Night!
Impressionist Bridge
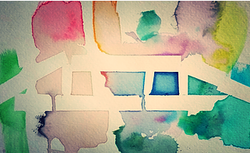
For our lesson on Impressionism we used watercolors to create a version of Monet's famous bridge painting. I first had the students that were able help me tape down a bridge shape using blue painter's tape. The students painted with watercolors and peeled the tape off after waiting a few minutes for the paint to dry. I would like to eventually create more tape-resist projects because the results are always amazing!
Sunprint "Photography"
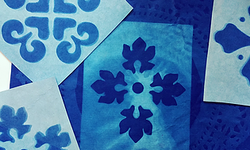
For this lesson I talked a little about the history of photography and its influence on art. Students used Sunprint paper to create designs using the light from the sun. Since I only had a half hour for each class and the process takes a few minutes, I made this a group project, or experiment. The only problem was not every class experiment worked out because you really do need bright sunlight (indoor lights do NOT work!) and a couple classes were stuck with rainy days. I showed the students how to place stencils and even small objects to create a "negative" just like photography. I was asked to make a project that we could potentially use for the school Holiday card, so I chose to use stencils that looked like snowflakes. When I had bright sun, the paper changed almost instantly and the results were pretty cool!
Baroque Fruit Bowls
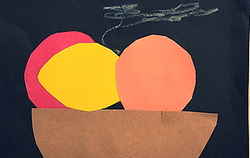
Students learned about the Baroque period and the way artists used shading to create the illusion of light in their paintings. Each student created a fruit bowl on dark paper with construction paper, then they were able to use oil pastels to shade and highlight different areas of their fruit bowls. These turned out adorable, and I would love to see them in a series all framed together.
Renaissance Rainbow Etchings
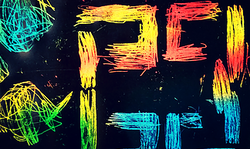
I really wanted an excuse to use scratch art paper, so I kind of stretched the connection to the Renaissance with this lesson. Students learned about the many different inventions and important discoveries during the Renaissance, including the invention of the printing press (this is where I tied in the use of the scratch paper, because it reminded me of the plates that they would etch and print from) Students were given stencils to trace designs, and other students created their own designs- including a student that filled his with beautifully drawn music notes!
Illuminated Letters
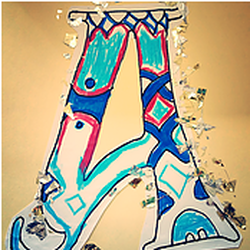
Students learned about the Middle Ages in Europe and how Kingdoms relied on knights and castles for safety. Each student was given the first letter of their name, cut out in paper and they were able to decorate the letter with markers and ornament flakes that were meant to represent gold leaf used in early Illuminated manuscripts. (Craft stores do in fact sell actual gold leaf, and maybe I would have used it with a very small group of students- but I found that ornament flakes, or even gold tissue paper is best for large groups of students)
Navajo Sand Art
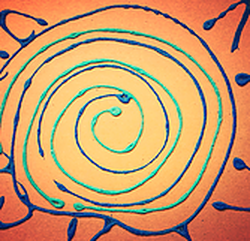
This lesson was also one of my favorites, especially because no matter how the students place the glue, the colored sand still looks really cool and the students had a lot of fun shaking the sand shakers. I first explained that North America was filled with many Native American groups and we learned about the different ways the Indians adapted to their environment. I bought colored sand from Michaels (DON'T BUY IN KIDS ART SECTION!!- I found sand super cheap in the section where they have all the terrarium stuff and fake flowers, there is kids sand art, but you will end up paying triple for a quarter of the amount of sand!) I was surprised how far the bags of sand stretched and I was able to save some in the end. I put the different colors into large spice shakers and let the students make a design with glue, then shake the colored sand over it. It's important to remember that if students want to use more than one color of sand, they will need to add glue in sections based on color- and pour the sand colors one at a time.
Aztec Calendar Stones
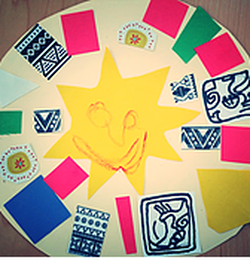
Students learned about Ancient Meso-American cultures in Central and Latin America and they created a calendar stone based on the traditions of the ancient Mayans and Aztecs. Each student recieved a cut circle and a sun template to decorate in the center. They decorated the rest of the stone with patterned paper, crayons and "glyphs" based on the picture-alphabet of the ancient Meso-American cultures.
Cardboard African "Masks"
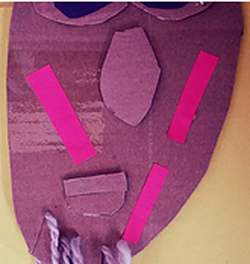
For this lesson students learned about the different art forms in Africa from small sculptures to ceremonial clothing, headwear, and masks. We talked about the importance of animals in African culture and the many different animals that make up the African ecosystem. Students made masks from cardboard, using colored paper, yarn, and cut cardboard shapes to make the facial features three dimensional
Chinese Cherry Blossom Trees
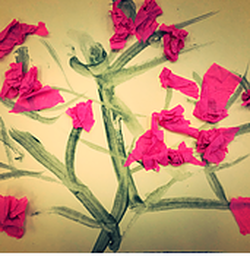
In this lesson we learned about Ancient China and the importance of balance in the Chinese culture. Students played an interactive opposites game on the Smartboard then we created beautiful watercolor trees using diluted black tempera paint with watercolor brushes (some students may be able to use straws to blow the paint on the paper and make branch shapes). After the branches were painted, students took crumpled pieces of red and pink tissue paper to make little blossoms on the trees.
Roman Mosaics
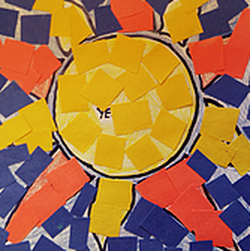
In this lesson we talked about ancient Rome and the eruption of Mount Vesuvius in Pompeii. This was one of my favorite lessons because it combined art and science with a beautiful volcano explosion! I made a makeshift volcano from plastic cups wrapped in duct tape painted a dark brown dirt color. I placed the volcano inside a plastic bin and filled dirt in around it so it could absorb the water from the explosion. I have to say I was pretty impressed with the way the volcano came out (It was not so pleasant moving it from building to building!) I used a simple vinegar and baking soda explosion (with a little food coloring for extra lava effect) and the kids absolutely LOVED it! After watching the volcano explode, the students each made "mosaics" using tiny construction paper squares in different colors. I also liked this lesson because I had recently visited a Pompeii exhibit at the Boston Museum of Science and I was able to show my own photographs of the artifacts.
Grecian Pottery
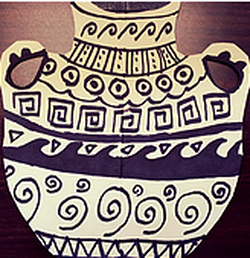
This is a classic lesson from grade school that I remembered enjoying as a child. The students were given paper templates in the shape of Grecian pottery on toned paper. The students used earth tone crayons to create shapes and designs on their pottery. We discussed symmetry and the use of geometric designs
Egyptian Name Tags
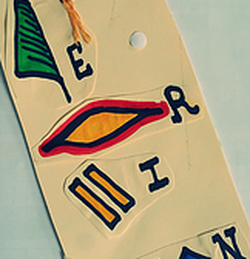
For my Ancient Egyptian lesson I had the students make an Egyptian "nametag" from paper tags I found at the recycling center. They used Egyptian Hieroglyphics to spell out their names and tied a popsicle stick to the top with colored string. I also included a "tomb dig" sensory bin filled with sand, that students each took turns digging through with a slotted spoon to find "artifacts" I had hidden beneath the sand. (I used small knick-knacks from around the house)
Sand Dough Stonehenge
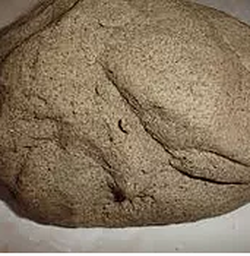
This lesson is an example of a lesson that didn't go quite how I wanted it to! I'm calling it my "Pinterest Fail" lesson. I discussed Stonehenge with the students and showed a virtual tour video. I talked about how the stones fit together and even showed the students a model I carved from plant foam that looked like a giant Lego piece. The students helped me create "Sand Dough" which we were supposed to make a miniature Stonehenge from. The students enjoyed creating the sand dough and forming small "rocks" with their hands, but the failure part came when I brought the dough home to dry- or attempted to dry. It didn't solidify the way I wanted it to and even after leaving all the "rocks" in the sun, the dough actually started to mold! So after scraping all the moldy (and stinky) rocks into the garbage, I decided that the dough would never become Stonehenge and that all Pinterest DIY Dough recipes are not created equal!
Paper Bag "Cave Painting"
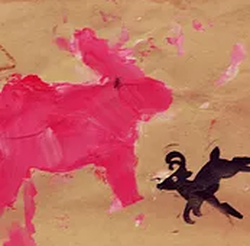
This was the first lesson I did with my students. My first curriculum unit was titled "Art Through History" and the most logical place to start was cave painting- some of the oldest art ever discovered. Each student worked on a small piece of roll Kraft paper, or a piece of brown paper bag. I created templates of different animal shapes and allowed the students to use both tempera paint (in earth tones) and crayons to color and fill in shapes. I also provided assorted stamps for the students that had trouble tracing designs. The students had an especially good time crumpling the paper after to make a rock-like effect.
Photo used under Creative Commons from pom'.
